AI Integration · Developer Tools
Colab CLI: Remote GPUs From Your Terminal
Google's open-source Colab CLI provisions T4, L4, A100, and H100 GPUs and TPUs from the command line. Install it, run a job, wire it into an AI agent.

Abhishek Gupta
4 min read
Sponsored
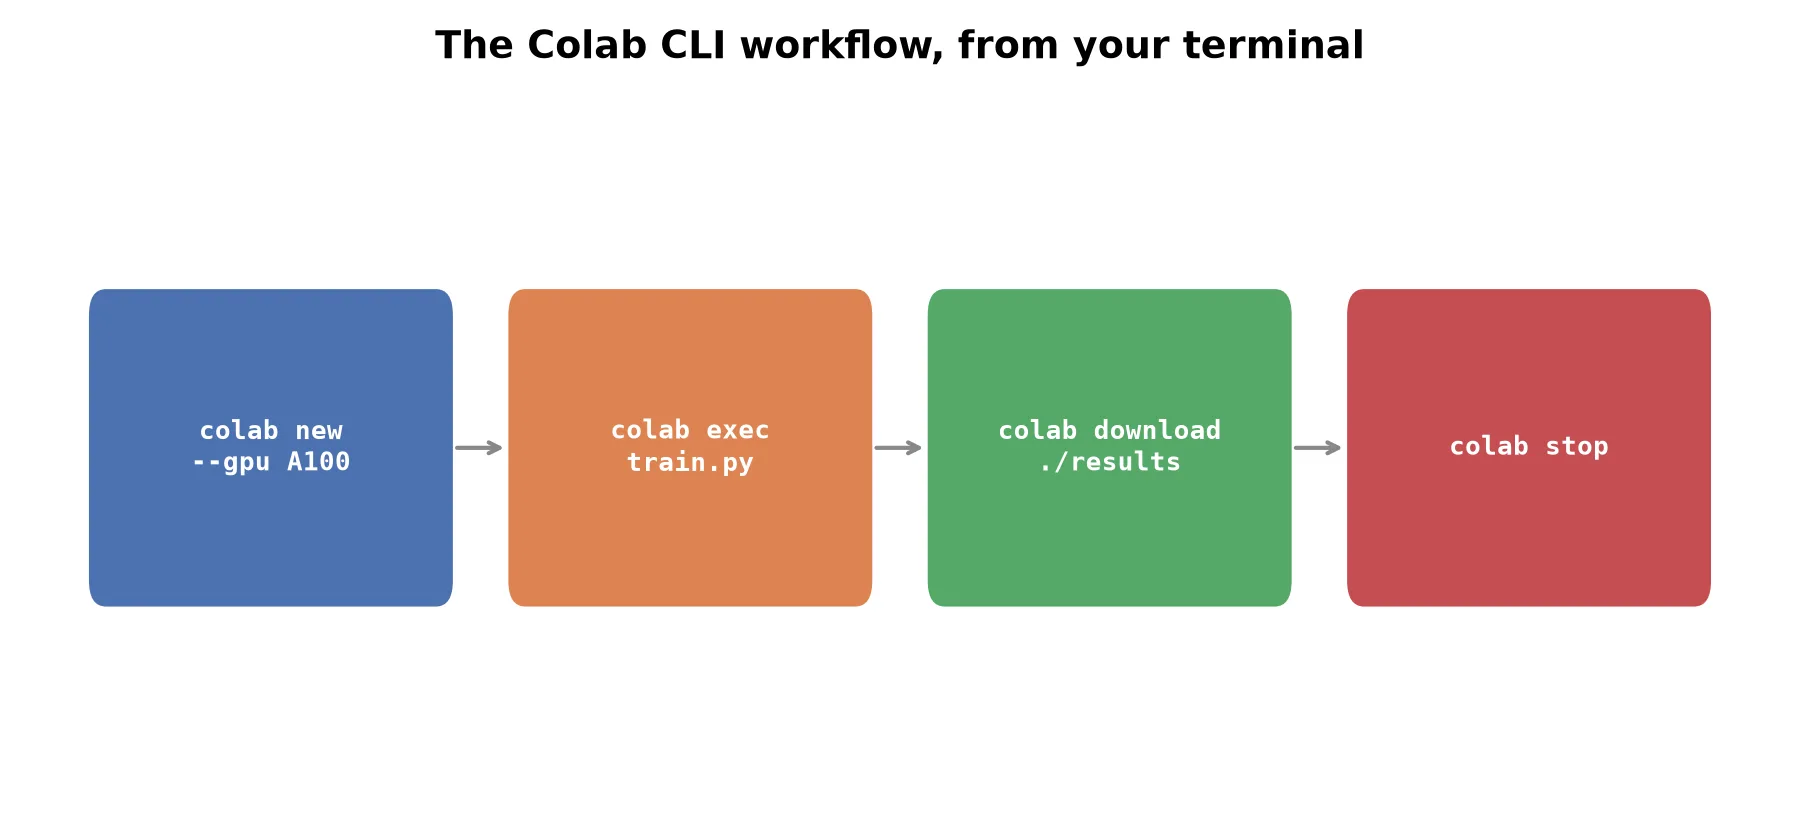
If you’ve ever opened the Colab web UI just to run a ten-line script on a GPU you don’t own locally, Google shipped something that skips the browser entirely. The Colab CLI, open-sourced under Apache 2.0, connects your terminal straight to a remote Colab runtime: provision a GPU, run your code, pull back the results, and shut the machine down, all without a notebook in sight.
Why this matters beyond convenience
The interesting part isn’t “no more browser tab.” It’s that Colab compute becomes scriptable. A one-off script that needs an A100 for four minutes has historically meant either paying for a dedicated GPU instance that’s idle 95% of the time, or opening a notebook, copy-pasting code into cells, and babysitting it. The CLI turns that into a shell command you can put in a Makefile, a CI step, or a loop, and it releases the machine the moment you’re done.
It also ships built to be driven by an agent, not just a human. The package includes a COLAB_SKILL.md file specifically so terminal coding agents (Claude Code, Codex, and Google’s own Antigravity are the ones Google names) can provision a runtime, run a job, and tear it down as one step inside a larger agentic task. If you’re building an agent that needs to fine-tune or evaluate a model as part of its own workflow, that’s a meaningfully different capability than an agent that can only write code and has no way to actually execute it on real hardware.
Installing it
The documented install path uses uv, the fast Python package manager:
uv tool install google-colab-cliOr with pip, if you’re not using uv:
pip install google-colab-cliSupport is currently Linux and macOS only. Once installed, confirm it’s on your path:
colab --versionYour first remote job
Provisioning a plain CPU session and running a command against it looks like this:
# Start a session (defaults to CPU)
colab new

# Pipe a script to it
echo "print('hello from a remote Colab runtime')" | colab exec

# Or run a local file remotely
colab exec my_script.py
For anything that actually needs an accelerator, request it explicitly:
# Request a T4 (cheapest GPU tier)
colab new --gpu T4

# Request an A100 for a heavier job
colab new --gpu A100

# TPU v5e for a training run built around JAX/TensorFlow
colab new --tpu v5e
Once a session is running, colab exec sends your code to that same runtime rather than spinning up a new one, so you can iterate without re-provisioning between runs.
Getting your results back
A remote GPU job usually produces something you actually need locally: a checkpoint, a CSV, a set of plots. colab download retrieves whatever your script wrote on the remote filesystem:
colab exec train.py --output_dir ./results
colab download ./results ./local-results
The CLI also keeps replayable logs of what ran, useful when a job fails three steps in and you don’t want to re-provision a GPU just to see the stack trace.
Interactive sessions and cleanup
If you want to poke around rather than run a fixed script, colab repl and colab console open interactive sessions against the remote runtime, functioning like a normal Python REPL or shell but executing against Colab’s hardware instead of your laptop.
When you’re done, release the machine:
colab stopThis matters more than it sounds. A forgotten GPU session is a forgotten bill. If you’re scripting this as part of a CI pipeline or a batch job, wrap your run in a pattern that guarantees colab stop executes even if the job fails:
colab new --gpu L4
trap 'colab stop' EXIT
colab exec batch_inference.py
Where this actually fits
This isn’t a replacement for a dedicated training cluster if you’re running multi-day jobs at scale. It’s aimed at the much more common case: a short, GPU-hungry task, a fine-tuning experiment, a batch inference run, a one-off benchmark, that doesn’t justify standing up or renting persistent infrastructure. For a small team or an agency running occasional ML workloads without an in-house GPU fleet, that’s a real gap the CLI fills cleanly, and it’s a lighter lift than the full local-inference setup you’d need if you wanted that hardware sitting under your own desk instead.
If your team is regularly reaching for cloud GPU compute for one-off ML tasks and hasn’t found a workflow that doesn’t involve either an idle billed instance or a manually babysat notebook, this is worth ten minutes to try before you build anything more elaborate.
Frequently asked questions
- What is the Google Colab CLI?
- It's an open-source command-line tool from Google that lets you provision a Colab runtime, CPU, GPU, or TPU, and run code on it directly from your terminal, without opening the Colab notebook interface in a browser.
- How do I install it?
- The documented method is `uv tool install google-colab-cli`, or install it via pip. It currently supports Linux and macOS; there's no native Windows support as of this writing.
- Can I use it with a coding agent like Claude Code?
- Yes. The package ships a COLAB_SKILL.md file specifically so terminal agents can drive the CLI on their own, provisioning a GPU, running a script, pulling back results, and releasing the machine as part of an agentic workflow, without a human manually opening a notebook.
- Do I still need a Colab Pro subscription to use bigger GPUs?
- Accelerator access follows the same tiers as the Colab web interface. Requesting an A100 or H100 through `colab --gpu` still draws against your Colab plan's compute allowance; the CLI changes how you access the runtime, not what you're allowed to provision.
Sources
Sponsored
More from this category
More from AI Integration
Sponsored
Discussion
Join the conversation.
Comments are powered by GitHub Discussions. Sign in with your GitHub account to leave a comment.
Sponsored